Air Cooler Maintenance:
Leak Detection and Tube Plugging Best Practices
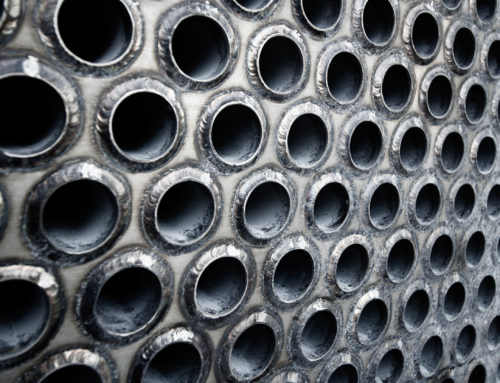
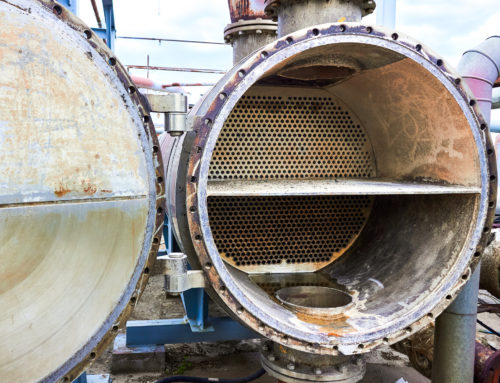
Air cooler maintenance is a critical yet complex process, especially for those overseeing plant operations. Air coolers present unique challenges due to their thinner tube sheets, higher operating pressures, and channel/header designs. When tube leaks occur, deciding whether to plug or replace a tube requires a clear understanding of best practices and equipment limitations.
A focused strategy for air cool maintenance that emphasizes proper tooling selection, reliable leak testing, and correct tube plugging methods is essential for maintaining performance and minimizing downtime.
Air Cooler Maintenance Tool Selection
Understanding Constraints and Dimensions
- Header Length Evaluation: One of the first challenges in air cooler maintenance is header length. While a 12-inch reach is typical, this can vary by application. It is critical to measure and confirm the actual header length before ordering tooling. This measurement dictates the required length of extensions for both test guns and plugs.
- Sizing Complexity: When sizing the seal set, it is important to know the tube OD X BWG, and whether the tube is at minimum wall thickness to get the most accurate result.
Tooling Strategy
Careful selection ensures that tools can effectively reach and seal the tubes without damaging the header or tube sheet.


Detecting Leaks Through Air Cooler Maintenance
Once the correct extensions are determined, the focus shifts to accurately identifying leaking tubes.
Preferred Testing Equipment
For air coolers, pressure-style test guns are generally preferred over vacuum-style guns. This is largely due to the design of the seal set. Pressure test guns typically use a seal sized to a specific tube ID, while vacuum seals rely on a taper that may be too large to fit through the plug hole in many air cooler applications.
The Air Cooler Leak Testing Process
- Seal and Extension Selection:
Once the tube ID and the distance to the tube sheet are confirmed, the proper seals and corresponding extensions for the test gun are selected.
- Standard Leak Test Procedure:
Before testing the bundle, perform a controlled test to verify proper test gun operation. Then follow standard air cooler leak detection steps:
- Secure Sealing: Ensure both ends of the tube under test are plugged with the seal.
- Pressurization: Activate the test gun’s trigger to introduce pressure into the tube.
- Monitoring: Closely watch the pressure gauge for any fluctuation or drop, which signifies a leak.
Tube Plugging
In the event that leaks are identified in the air cooler, tube plugging is usually the most efficient and cost-effective repair method, especially for tubes located in the middle of the bundle. Replacing a single tube in the middle of the bundle often does not merit a full retube, so plugging is the best route.
Plug Selection and Sizing
Tube plugs must be sized for the tube OD and the tube sheet thickness. Depending on the operating pressure of the unit, a medium or high-pressure plug may be required for long-term reliability. In that case, it’s important to verify that the plug’s sealing area will fit in the tube sheet area. If the plug would overhang past the tube sheet into the tube, an expander can be used to lightly expand the tube end past the tube sheet. This provides an area for the plug to be set while the sealing area makes contact with the tube within the sheet. The process of rolling past the tube sheet should be done by hand and should be monitored carefully.
For low-pressure air coolers, one-piece plugs can be used. Plugs can be ordered with a tap on the back, allowing them to be used with a threaded rod to reach through the header box. Once in the tube, a hammer is used to set and secure the plug.
Conclusion
By following proven air cooler maintenance best practices for tooling selection, leak testing, and tube plugging, maintenance teams can effectively restore efficiency and reduce unnecessary downtime.