
5 Tips For Easier Air Cooler Maintenance
The design of an air cooler can be challenging for operators due to limited access to the tube sheet. Similar to a shell and tube heat exchanger, air coolers are made up of stacked finned tubes with header or water boxes on either end of the vessel. This design leaves the tube sheet bundle partially exposed to increase cooling, but limits access to the tube ends. While air cooler maintenance can be challenging, there are a few tips and tricks that can help make the process easier.
1. Determine The Proper Reach
The header box design of an air cooler requires the use of long reach tooling for maintenance. In general, air coolers have an 8” gap between the header box and the tube sheet, however, this distance can vary from vessel to vessel. It’s important to determine the distance from the face of the water box to the back of the tube sheet before purchasing tooling. This distance will be the minimum reach required for tooling and extensions. For example, if the distance is 10” then a 10”+ reach tool or extension should be used.

2. Size Tooling To The Tube ID
One common challenge operators face when maintaining air coolers is getting tooling that will accommodate both the tube ID and the header plug opening. Most header plug IDs are ~1/8” larger than the tube OD, making it difficult to use tooling with a varying OD, such as a taper. As a result, it’s recommended to select a product that can be sized to the ID of the tube, rather than an OD range.
Mechanical plugs are a great option for plugging air cooler tubes since they are tube ID specific and can be set in place using an extended hex driver. In some cases, manufacturing a tapered plug to fit through the plug hole may better suit a customer’s needs. In that situation, many customers will order special plugs with a threaded hole drilled in the center. This allows the operator to thread a rod into the plug, insert it in the tube, and hammer the plug into place.
When it comes to testing tubes for leaks, pressure leak test guns are preferred over vacuum test guns. This is because the seal sets are sized to the ID of the tube, as opposed to the tapered nozzle found on a vacuum gun. If sized to the correct tube ID, pressure test guns will allow the operator to reach through the plug hole to access the tube sheet with assistance from a properly sized extension.

Mechanical Tube Plug

Pressure Leak Test Gun
3. Set Tubes Prior To Expansion
Installing tubes in an air cooler is fairly similar to a shell and tube exchanger in regards to the expansion process itself. However, since the tube and tube sheet are not readily accessible, there is a higher chance of tubes rotating during expansion.
Tack rolling or nose rolling the tubes as a first operation can prevent tubes from spinning or moving during the expansion process. One method for doing this is to hold a piece of bar stock or pipe through the plug hole so it meets up against the tube being rolled. This will allow the operator to set the proper projection and help keep it in place while it’s tack rolled. Once the tubes have been lightly rolled into the tube sheet on one end, both sides can be fully expanded.
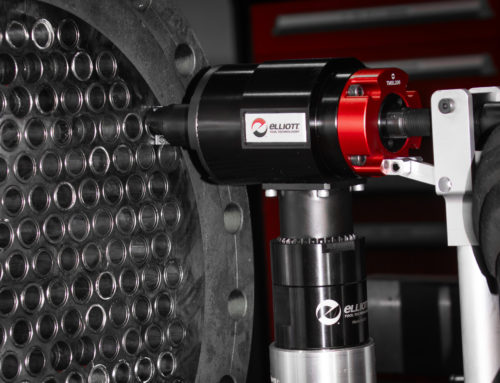
4. Use An Assisted Rolling System
Assisted tube rolling systems are one of the most effective methods for tube installation as they reduce re-work, improve operator ergonomics, and increase tool life. Each system comes equipped with different features to suit your needs such as torque control, an articulated arm, and auto-lubrication.
Torque control systems accurately measure torque in order to roll to the target wall reduction each time, eliminating the amount of rework needed on a vessel. An articulated arm will support the weight and absorb the torque of the rolling motor, allowing the operator to effortlessly roll and move the motor into position. Lastly, auto-lubrication provides automatic expander lubrication in order to increase tool life and reduce downtime spent re-lubricating tooling.

Assisted Tube Rolling System
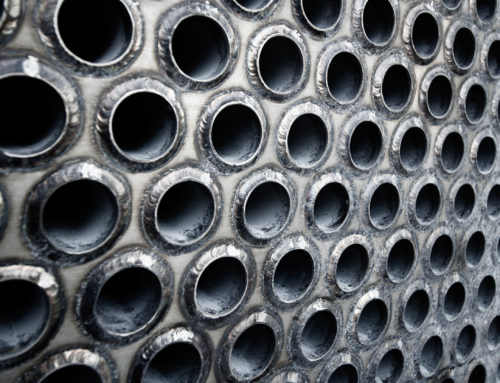
5. Pull Stubs From Behind The Header Box
Traditionally, heat exchanger tubes can be pulled from the front of the tube sheet. However, since air coolers have header boxes at both ends, pulling tube stubs from the front would be a challenge and might require special tooling. One of the easiest ways to remove tubes in an air cooler is to first cut the tubes behind the header using a tube cutter or other traditional methods. After all the tubes have been cut at both ends, the bundle can be removed. This provides easy access to the back of the header and allow a collet style tube puller to pull tube stubs from the back of the header box.
Overall, design of an air cooler can make tube maintenance activities more challenging. However, there are several tips that can make the process easier. Determining the reach of the vessel and the ID of the tubes will make it easier to determine what tooling is needed to complete the job. Additionally, tack or nose rolling the tubes and using an assisted rolling system can allow for a better expansion and reduce the amount or rework needed. Lastly, removing the tube bundle and pulling stubs from behind the header will make the tube removal process much more efficient.